Thursday, May 7, 2015

Overnight Oatmeal Waffles


Oh HELLO beautiful breakfast!! We have been on a waffle kick. Correction, my SON has been on a waffle kick. He is a very picky eater and when I saw how he gobbles up waffles, I knew I had to find a healthier version to make it more hearty. And so I want to share with you my discovery.

The original recipe is from the blog One Lovely Life I liked that there was oatmeal but did not like the 7 TBSP of BUTTER! I was making this recipe for a play date I was hosting. And was caught up with getting everything on the table. I put the butter in the microwave to melt to add to the batter......and guess what!? I FORGOT to add it! I noticed the waffles were crispier, which the original buttery version the waffles are way too soft, they need some sturdiness to them. Anyways, my guests raved about them, and then emailed me for the recipe. Only after they left, I was cleaning up and putting something in the microwave that I realized that there was completely NO BUTTER in the waffles. And the batter did not stick to my waffle iron either. I do spray the waffle iron at the very beginning, but then that's it. So I am including 2 TBSP in my recipe, just to make them a little fluffy. Oh and some ground flax seed of course ;)

Ingredients:
2 cups oats
2 cups buttermilk
1/2 cup flour
1 egg
2 TBSP ground flax seeds (optional)
2 TBSP sugar (or less to your taste)
2 TBSP melted butter
1 tsp vanilla
1 tsp baking powder
1 tsp baking soda
1/2 tsp salt

Instructions:
1. In a medium bowl combine oats and buttermilk. Cover and refrigerate overnight.
2. When ready to prepare waffles, stir in eggs, melted butter, and vanilla. Then add flour, flax seeds, sugar, baking power, soda, and salt. Stir until just blended - batter will be quite thick. If you feel it is too thick (wooden spoon standing straight up) you can thin the batter out with some milk.
3. Cook in waffle iron. Each waffle iron is different. You will want to leave them in a bit longer than normal for the oats to cook and waffles to crisp. I scooped the batter generously in the middle and then spread it out. Don't add too much because this batter expands, leave some room on the edges.

Mixing the oats and buttermilk at night.

In the morning, oats have soaked up most of the buttermilk. 

All the ingredients ready to GO!

Mix, mix, mix.

Spreading the batter out.

Viola!

My last waffle, trying to use up the last of the batter
and added WAY too MUCH!

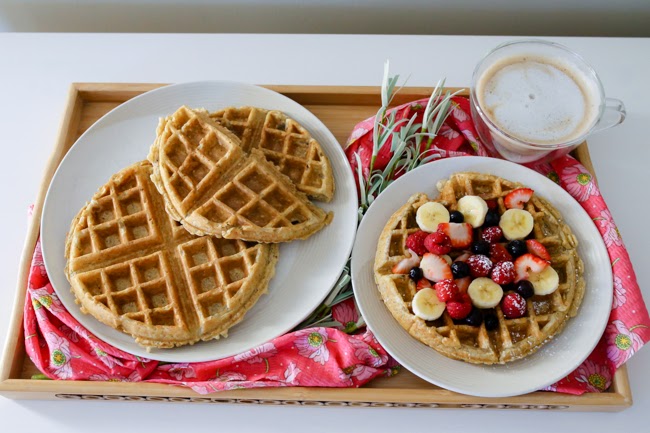
Pile the fruit....who needs maple syrup!?


Little Mister all SMILES :)
Little Miss busy feeding her bunny.


Saturday, September 13, 2014

Boneless BBQ "Wings"


I love when my momma comes over with a new recipe she wants to try. Score! Plus, she is always willing to clean up. I would cook 3 course meals everyday but its the clean up I dread. Oh to have a clean up crew like Martha Stewart! These Boneless BBQ Wings are made out of chicken tenders. You can leave them without the sauce for little tikes to dip in ketchup like chicken nuggets. I also loved the Applebee's Crispy Orange Chicken Bowl, so I will include the home-made copy-cat orange sauce at the very end. I once cooked lunches for my husband's office (yes, I am crazy, I signed up to cook 6 grown men for pocket change.....let's just say I took a leave of absence after one month and never returned!). I made them the Orange Chicken Bowl and they could not believe that it was from scratch. After making theses Boneless BBQ Wings, I knew I would try them with the orange sauce as well. There are so many variations to how to coat the chicken that really....the sky is your limit!!

This dish can be a great appetizer or part of the main meal


Ingredients:
2 cups flour
1/8 tsp ground pepper
1/8 tsp garlic powder
1 tsp salt
1 tsp. paprika
Weber's Kickin' Chicken -optional
1/2 cup BBQ sauce (or more)

Directions:
1. Combine the flour, salt, pepper, paprika garlic powder (I also add Weber's Kickin' Chicken spice as well for a nice kick). Coat chicken tenders in flour mixture and let stand in the refrigerator for about an hour. I put all the chicken & flour mixture in a tupperware with a lid and shake to evenly coat chicken.
2. After taking the coated chicken out of the fridge and a lot of the flour was absorbed, coat again with a little more flour and shake.
3. Heat a frying pan with oil. Fry up the chicken.
4. Coat fried chicken with BBQ sauce or whatever sauce your little heart desires.

the ingredients

cutting the chicken into 1" pieces

seasoning the chicken

adding the flour to coat

sauteing some veggies for the side

why does everything taste better fried!?


love me a busy cooktop!

serve as an easy appetizer

told you it was kid-friendly ;)


Applebee's Rice Pilaf:

Ingredients for the Rice Pilaf


Poor quality pic, but the only one
 I saved from my days of being the lunch chef.

For the recipe --- Crispy Orange Chicken Bowl and Rice Pilaf


Thursday, August 21, 2014

How to Meal Plan

I thought it would be interesting for you all if I shared the method to my madness of meal planning. 
Please do not fear, it is stress-free, will hopefully save you time (poss. $$ since you will use all the groceries you bought) and you will feel like you are in control of your kitchen! 
There is no one proper way to do it, you need to customize it for your family. I think this is why many people give up on meal planning, they over-estimate how much their family eats, buy too many groceries, or get upset that their "scheduled meals" didn't correlate with what day of the week they were planned for.
Here are some tips to get you started:

What my typical meal planning "work space" looks like
  1. ASSESS your family eating habits. Sounds silly, but this will help determine your success. Keep a little notebook and jot a few things down: how many meals you eat a week, what your portion sizes are, how many leftovers you have (and what you do with them: for next day lunches or next day dinner). Ask your family what they like to eat. If you finding trends: hmm I make a lot of Mexican style dinners, or pastas...pick a day of the week and dedicate it to your family's favorites. For example: Mondays: Mexican; Tuesdays: Pasta; Wednesday: Grill, etc.......
  2. SIGN UP for weekly recipe emails from you favorite websites, get a Bloglovin' account, and have fun browsing blogs and websites for inspiration.
    • After my first Cooking Light Magazine and Nutrition Course in Nursing School: my life was never the same. I had a newly ignited passion for healthy and flavorful eating and cooking. I would rip out recipes out of the magazine that I liked and wanted to try and then made my own recipe binders. It was a hobby, I seriously have 7 recipe binders. And then Pinterest came along, which is the same concept expect in the digital world....why didn't I think of that!?     Here are some great links to get ideas from:
    • BLOGLOVIN' : can be accessed from your PC or as an APP : best way to keep track of all your favorite blogs in one place. If you like a recipe/post you can "LIKE" it and it will be saved onto your account. So when you are meal planning, you just have to click on your 'liked feeds' and you have recipes that you intended to try all right there and not need to scroll through 100's of feeds looking for it. Brilliant. The blogs that I follow:
    • Lastly I must mention Kraft Recipes; although I do not use this website any more. I used it frequently when I just got married, and wasn't too sure about my cooking skills. The recipes are really easy and basic, but they tend to have a lot of processed ingredients such as: Velveta, canned condensed soups, etc. They have gotten better over the years and have a 'Healthy Living' section. This can be a good starting place, if you are a novice cook.
  1. ZIPLIST this is a grocery list app I have on my phone. As soon as something pops into my head, I immediately write it down because I will forget!
    • You can categorize your grocery list by store aisles, so no more backtracking across the grocery store bc you forgot an item. I also have multiple lists going: Costco, Target, Trader Joe's, etc.
  1. KEEP A STOCKED PANTRY
  1. MAKE THE MEAL PLAN LIST
    • This may be intimating for some, but if you have great recipes up your sleeve it should be a breeze. This is also why I said in the very beginning to figure out what/how much/favorites/trends your family has. If you do your recipe & family research this should be a cinch!! (Personally I have fun on this step).
    • I usually plan for 4-5 meals for the working week and 1-2 meals for the weekend, depending what's going on in terms of weekend plans. I try 1-2 new recipes a week.
      • If you have never meal planned, only use your favorite & trusted recipes so that you can get the flow of things, and then start implementing new recipes
    • I don't write the days of the week when planning the meals, I just list the meals. This gives me flexibility and then I don't get frustrated when the "Monday Meal" doesn't happen till Wednesday! Life happens, things don't always go as planned. I know.
    • I have had the same (dollar store) notebook for almost 3 years now. I am on my last page and looking back through all the pages brings me happiness: I have highlighted the good recipes, there are cross-out ones with sad faces, there are check marks and happy faces.
    • Yes I know there are online options to meal plan, but there is some satisfaction to highlighting, and crossing out that I want to continue with paper and pen.
      • I have made an Excel Spreadsheet from the highlighted recipes. Recipes that my family loved and I will definitely be making again. Since I try so many new recipes out, this is a good way to add them to my "good list"
      • My next step is to add direct website links to each, so I just click on the name and it take me straight to the recipe. 

My husband says I have issues...noooo....what issues!? I consider it a hobby.


  1. PICK A DAY, make your grocery list and go grocery shopping (once).
    • I generally go on the weekend, so my husband can be with the kids while I shop away. Yes going to the grocery store without kids is FUN. 
    • I really really try to go just ONCE a week and have everything I need for my meals for the rest of the week, this makes me very happy :) :) :) And so it should make you.
Even if you have read all this, maybe even tried it out, and still are not convinced that meal planning is for you. I do hope you have learned something, or have taken one of these tips
 and implemented it into your weekly meal flow!

:) HAPPY MEAL PLANNING :)


Monday, August 4, 2014

Baked Cheesy Ravioli


Ooey goey cheesy goodness.
I had this dish while visiting my dear friend, Lily, in Chicago and I have been making this dish many years after. Thank you for the inspiration!!
This dish is easy to make, and definitely delicious! I buy fresh ravioli at Costco. They sell it as a two pack, so I boil off one pack, and throw the other one in the freezer for later (when I am pulling my hair out, its 5pm and I don't know what to make for dinner!) LIFE. SAVER. 

Ingredients:
1 pckg. ravioli (fresh or frozen)
1/2 small onion, diced
8 oz. portabella mushrooms, sliced
4 oz. cherry tomatoes, halved
2 handfuls spinach, thinly sliced
2 cups heavy cream
1 clove garlic
3 Tbsp pesto (or to taste)
Mozzarella & Parmesan cheese 

Directions:
1. Put pot to boil for ravioli (follow pckg cooking instructions) and preheat oven to 375F
2. Saute onions and mushrooms in olive oil. Add cherry tomatoes, heavy cream, garlic & pesto; let boil for a few minutes. (I do not have spinach in the photos below, but it does add a nice flavor. Add it at the very end when sauce has boiled over and spinach has wilted.)
3. Pour sauce over boiled (and drained) ravioli; gently mix for even distribution. 
4. Cover with foil and bake for 20 minutes. Then remove foil, load on the cheese and bake an addition 5 minutes uncovered.

**short-cut tip: I always keep pesto and sauteed mushrooms in the freezer and am so so thankful that I do when I need to put together last minute meals! I went into detail on how I do this in my Pesto Rose Mushroom Chicken Pasta If I remember to defrost the mushrooms great, if not then I throw them in the microwave, press the 'defrost' button and I am good to go. The pesto I just chip off a big chunk add it to the sauce it will melt right in!


most of the ingredients
sauteing the veggies, really anything goes!

always love a busy stove top, boiling off the ravioli as well.

the more cream, the better

added the cream sauce to the ravioli
CHEESE....no other caption needed

after taking it out of the oven.


all done. ready to dig in.